|
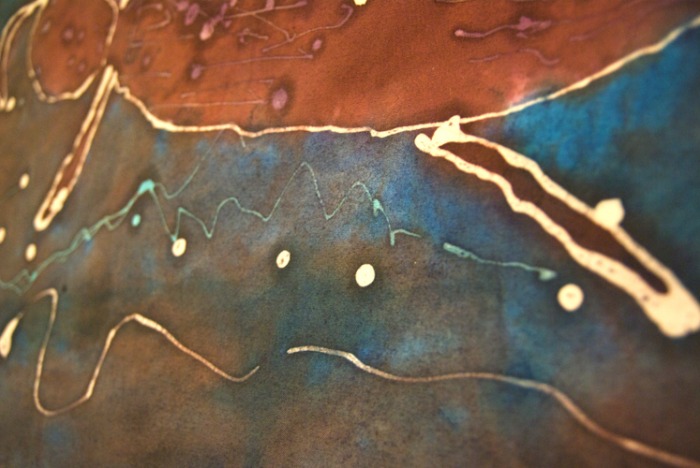
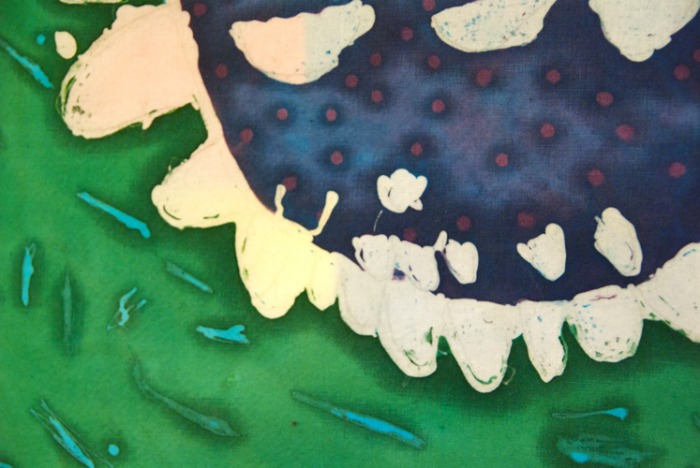
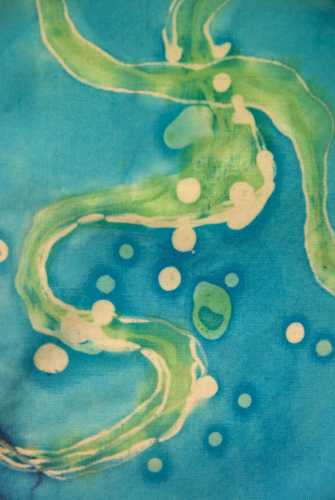
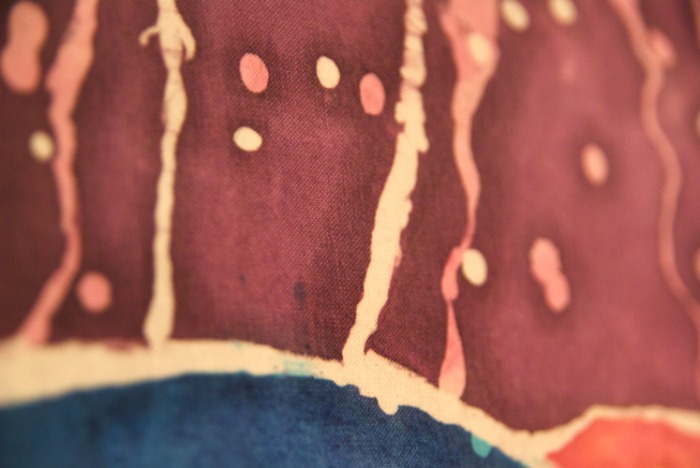
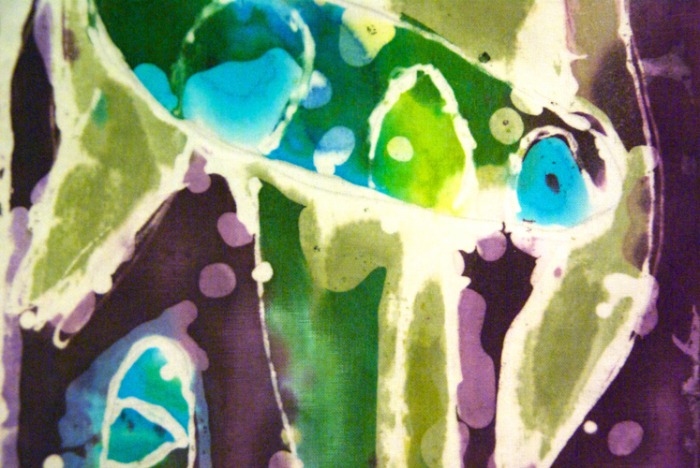
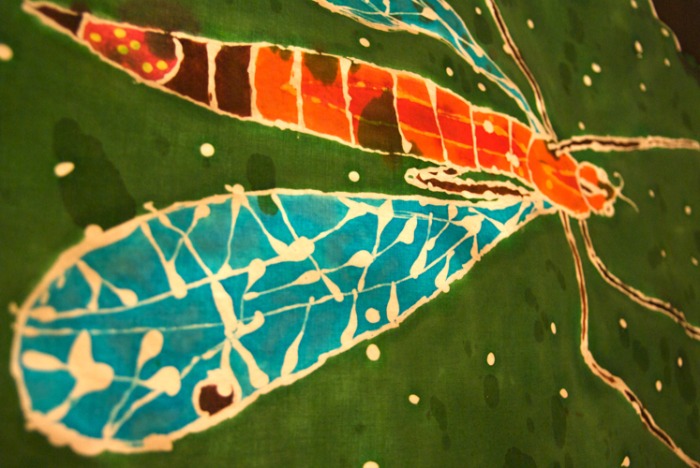
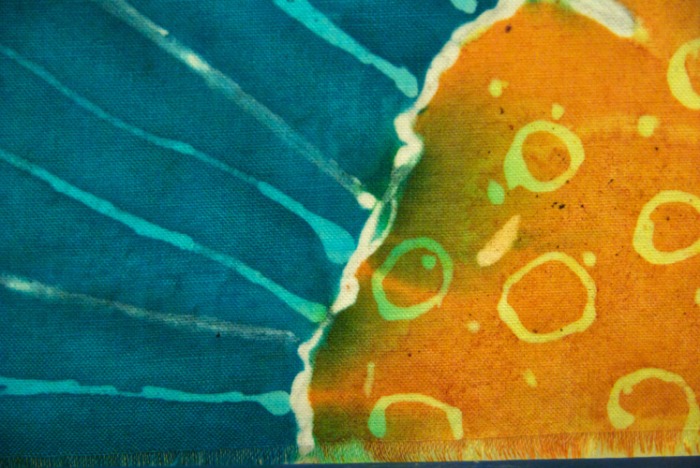
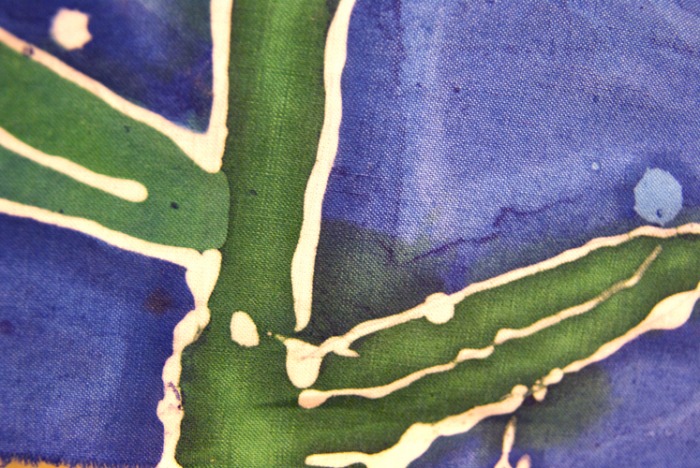
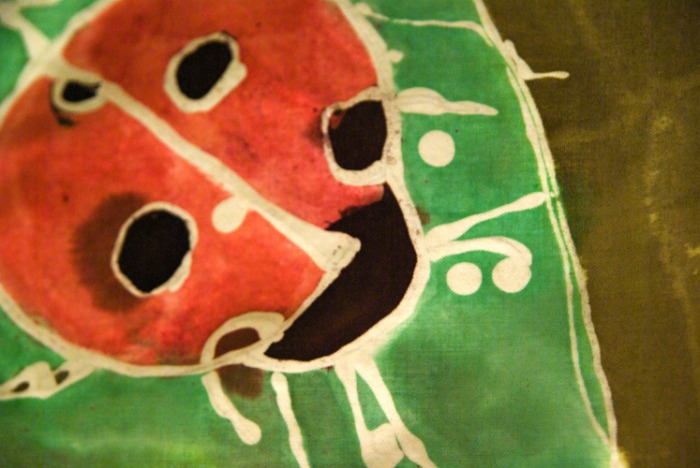
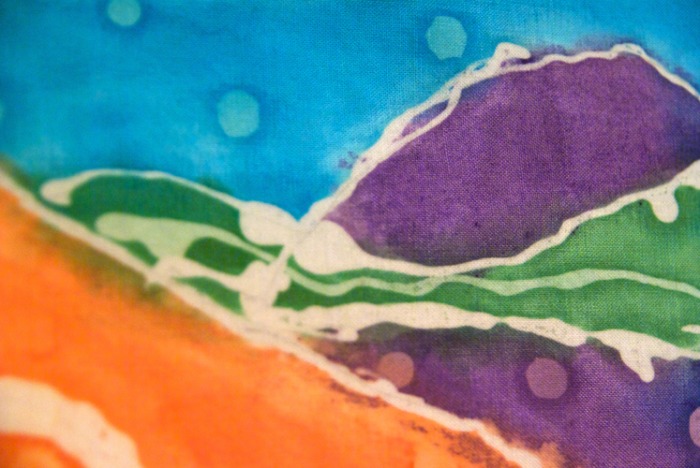
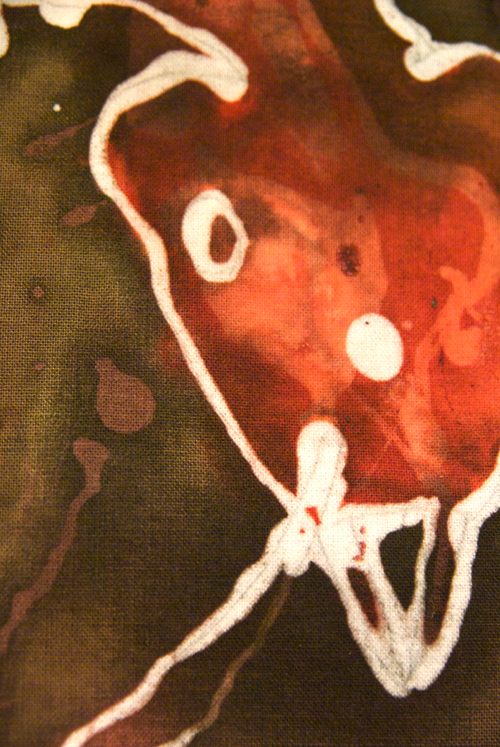
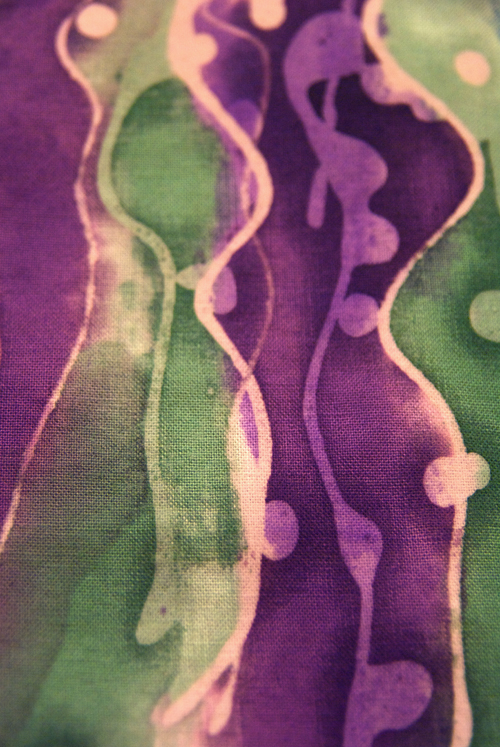
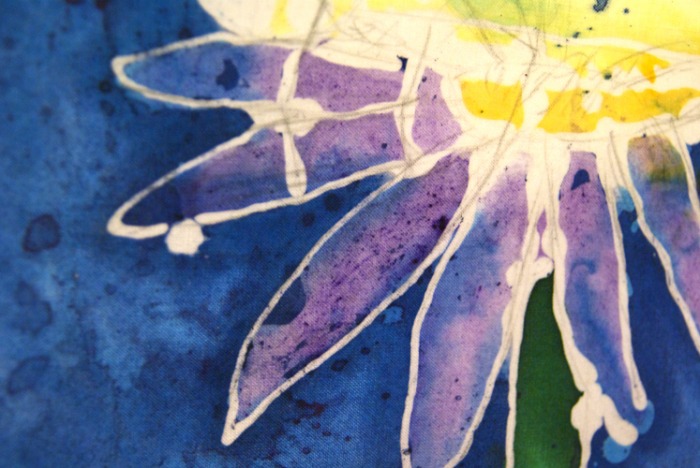
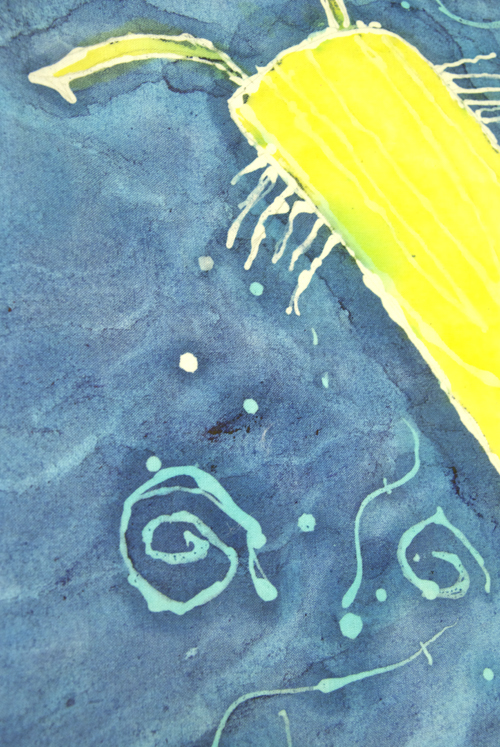
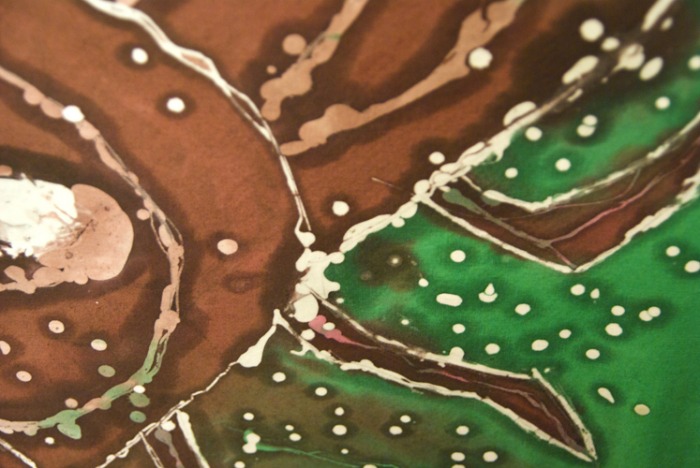
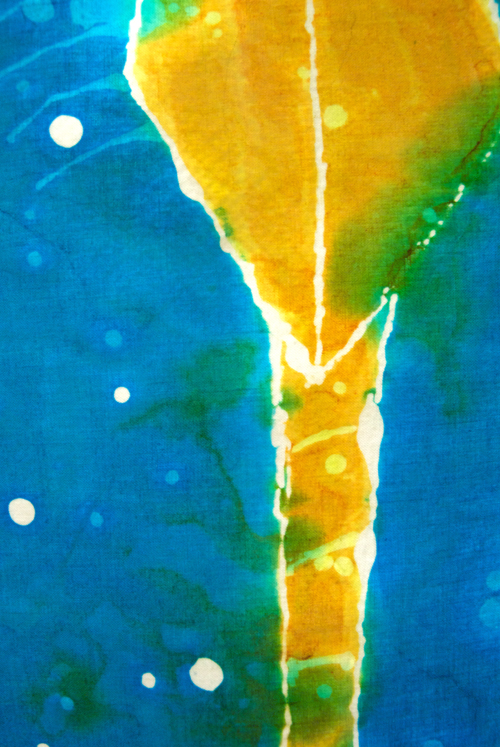
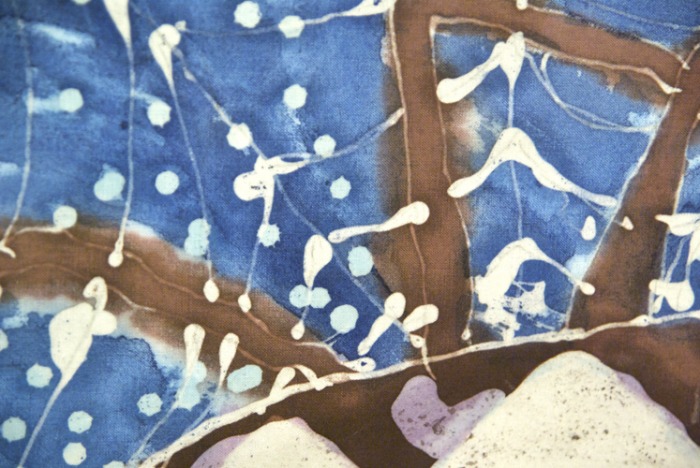
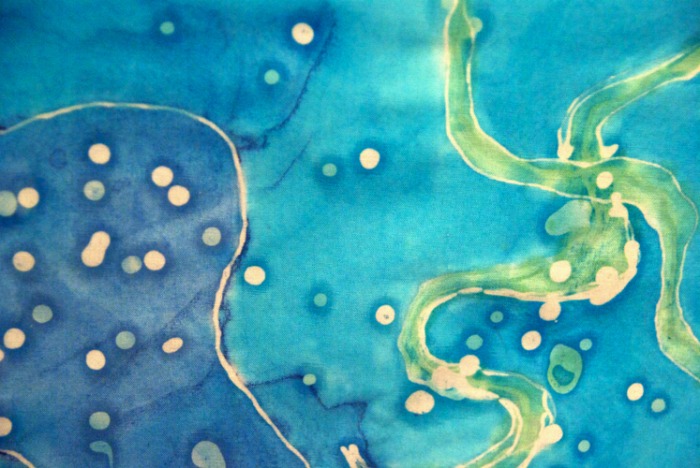
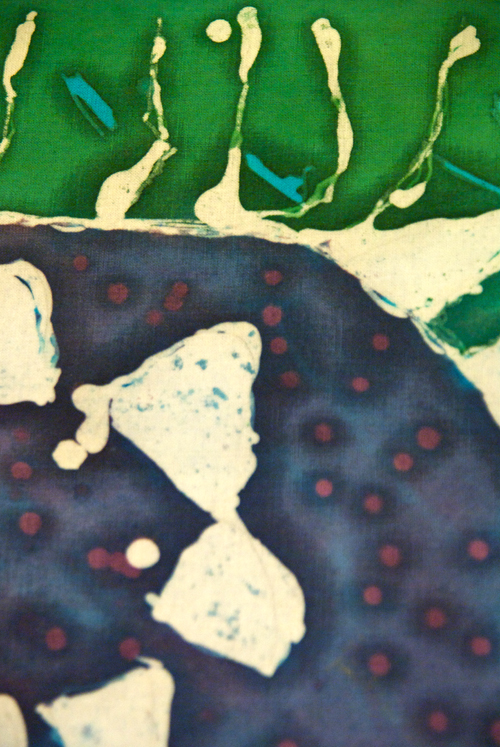
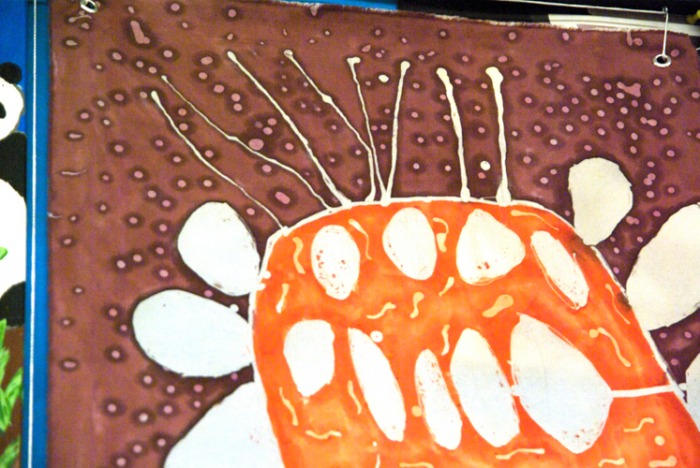
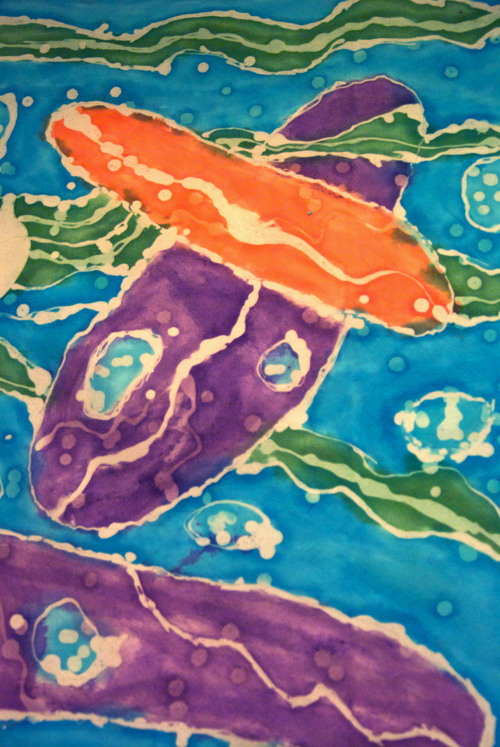
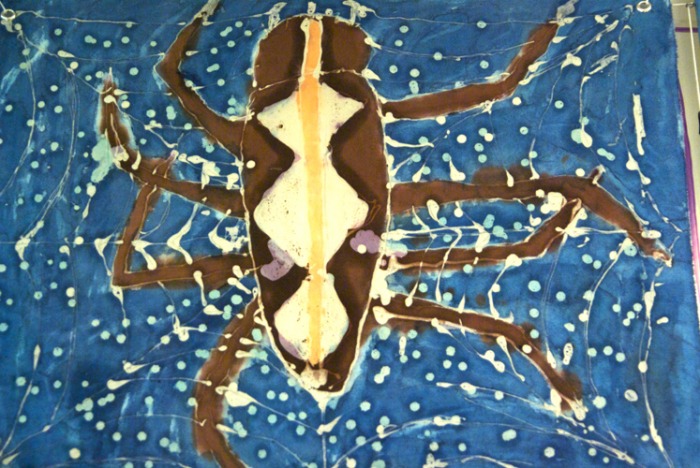
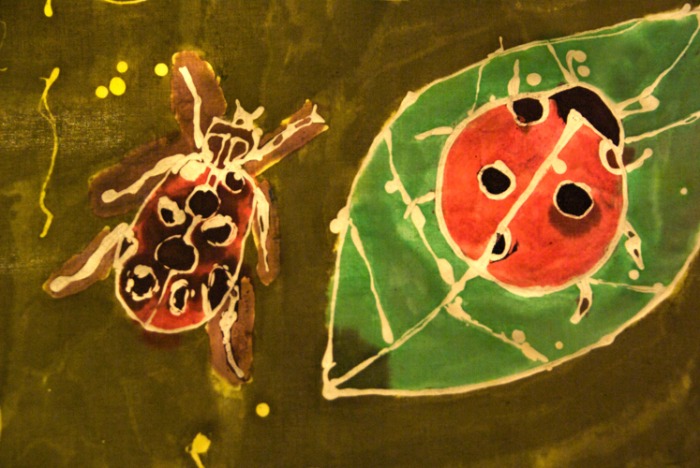
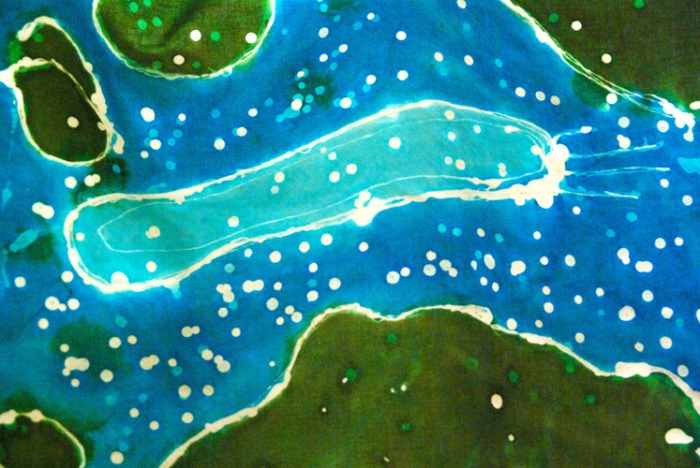
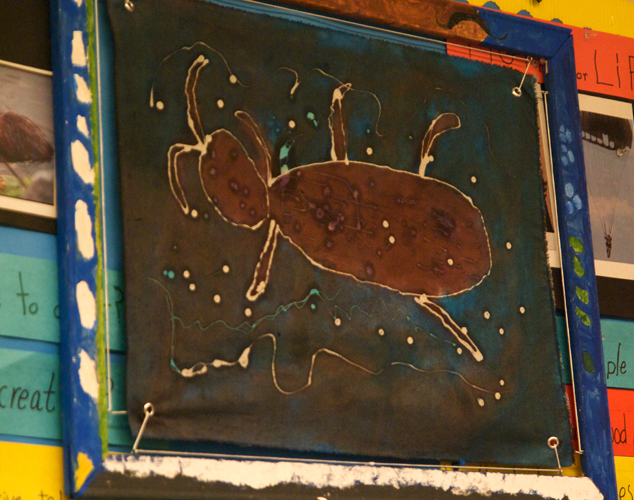
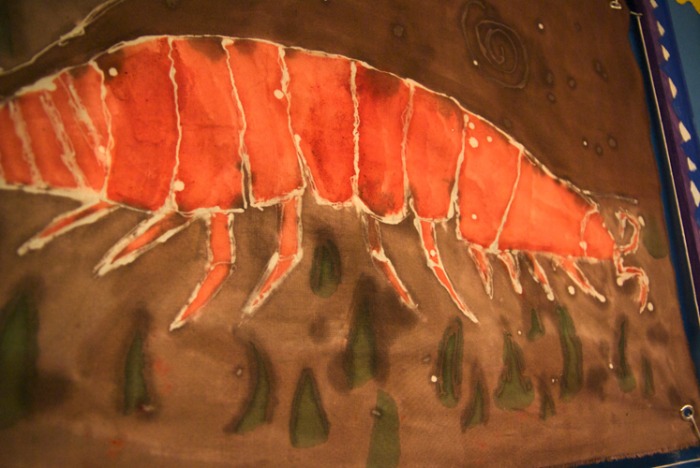
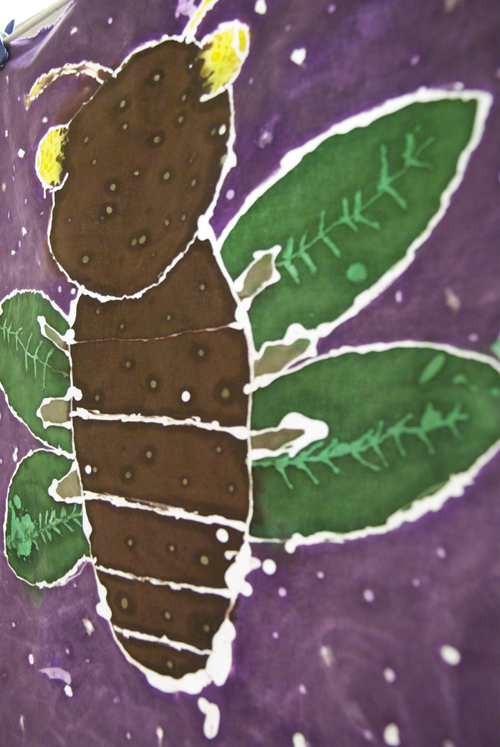
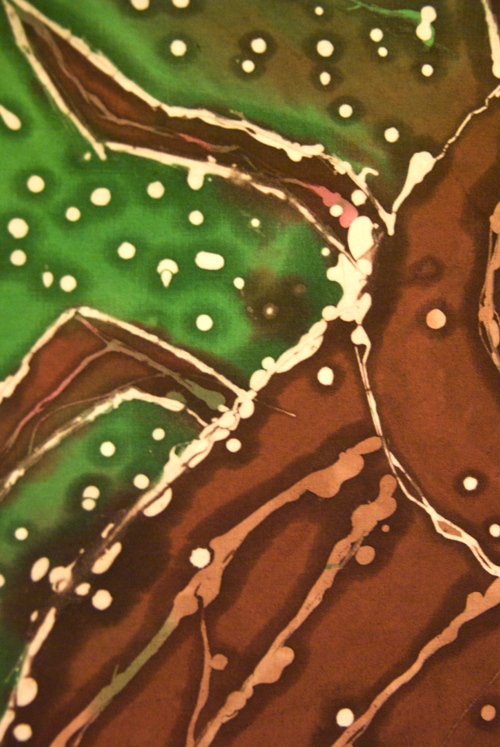
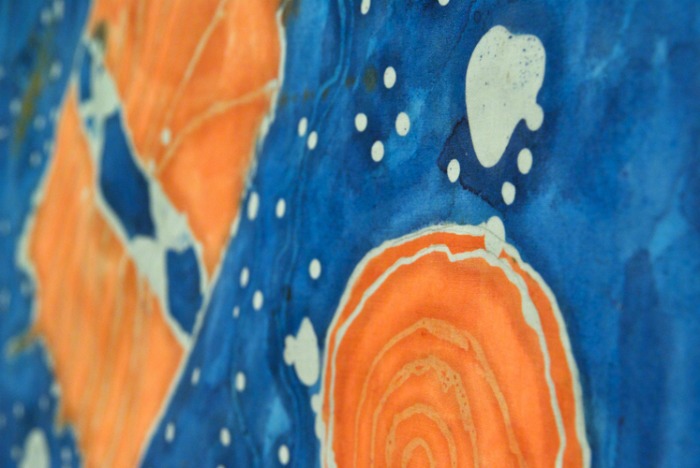
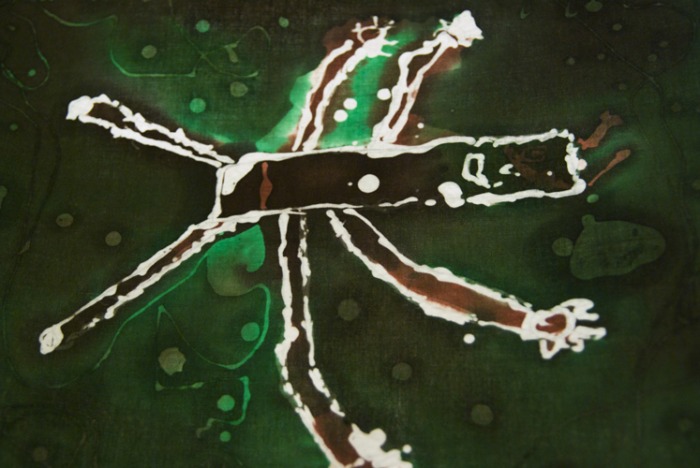
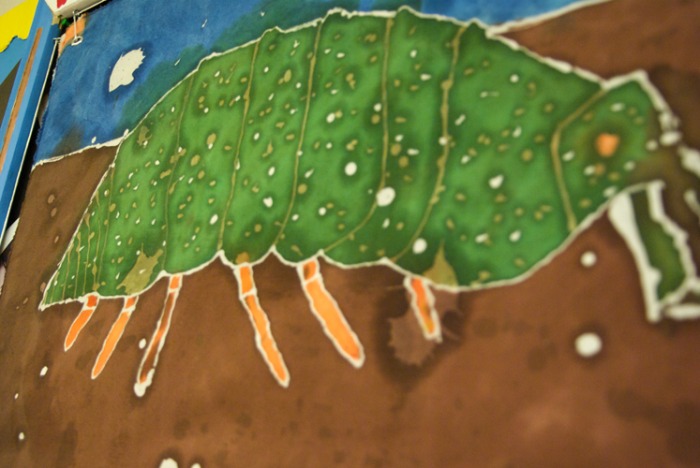
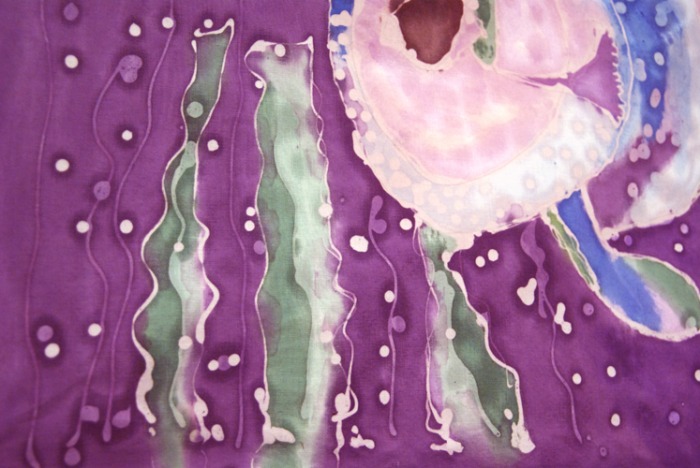
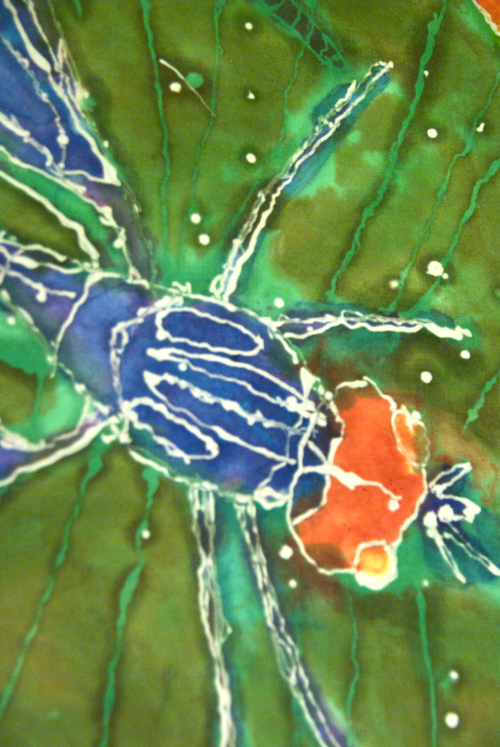
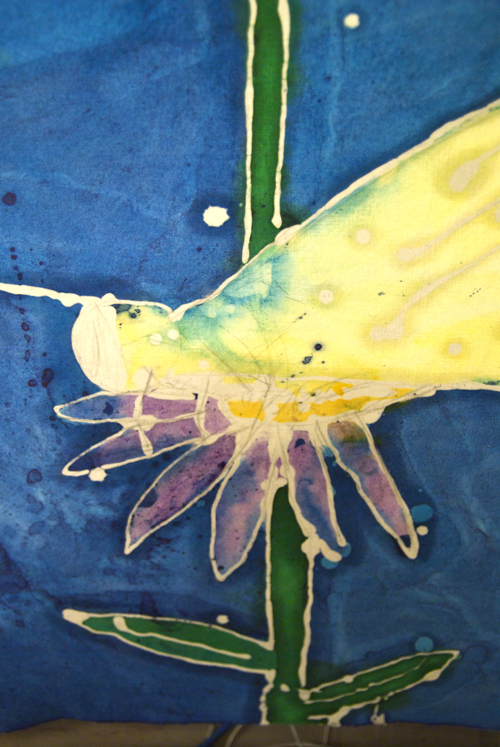
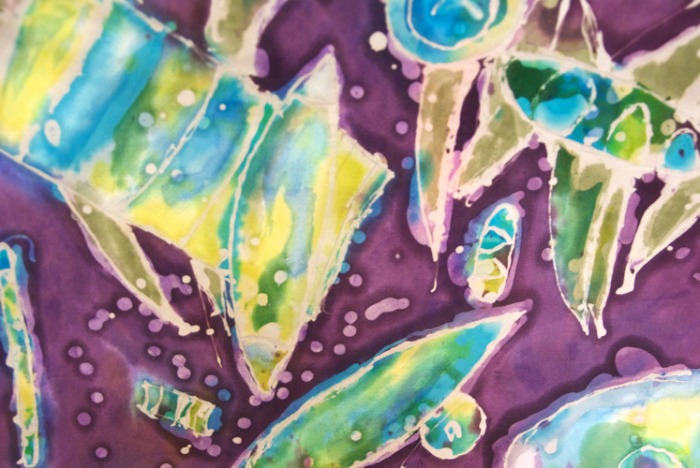
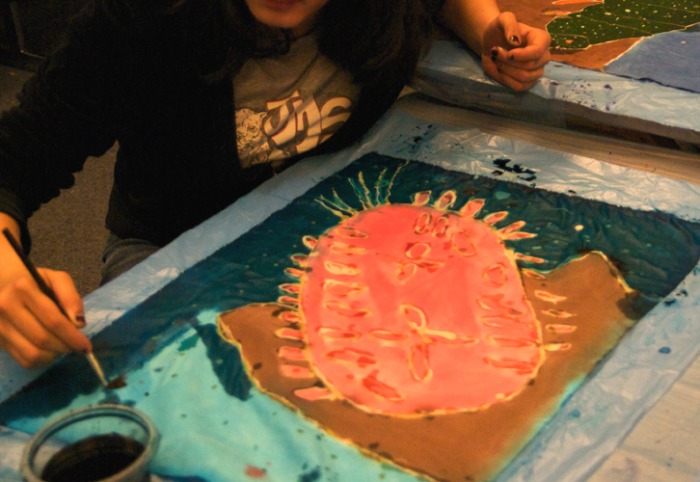
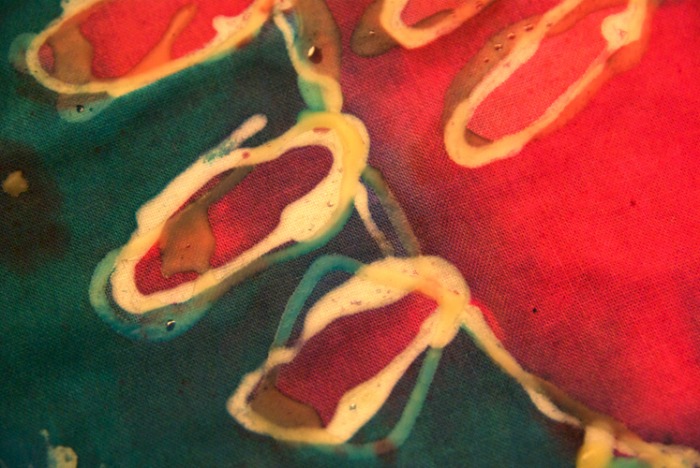
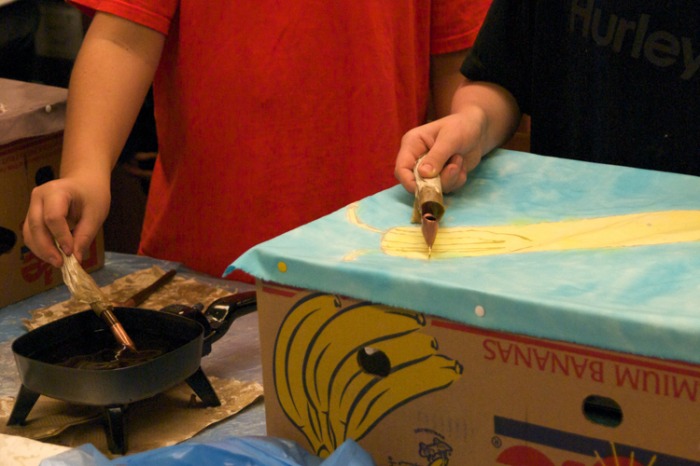
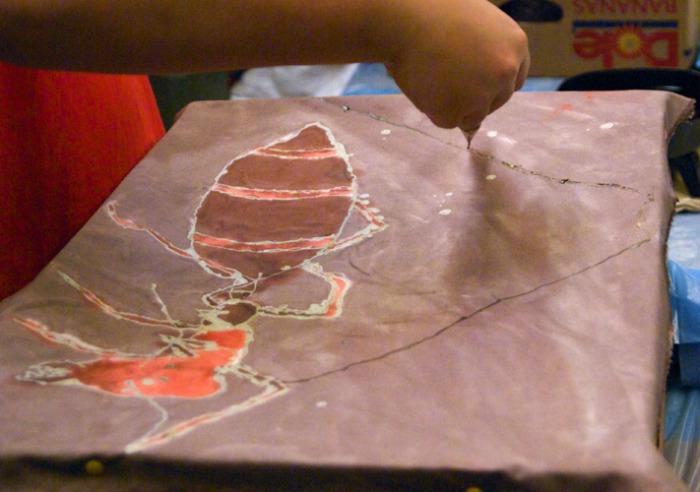
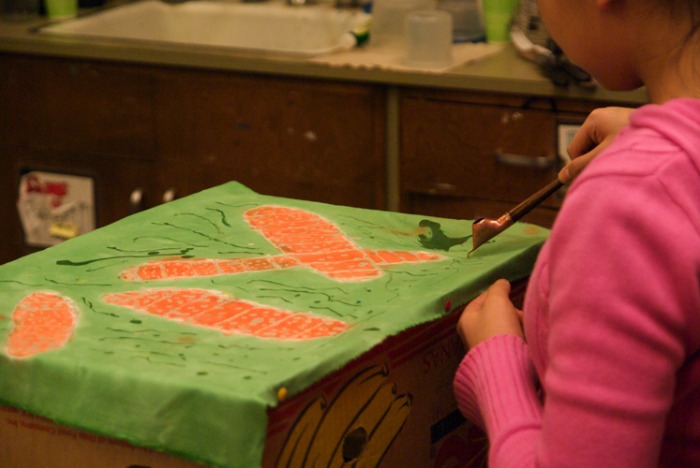
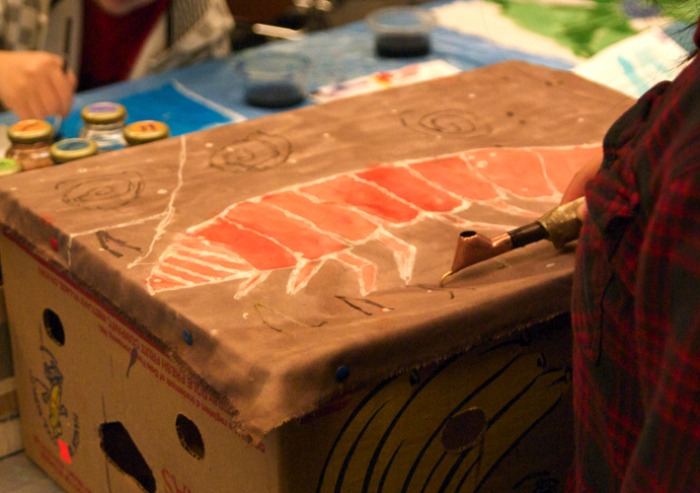
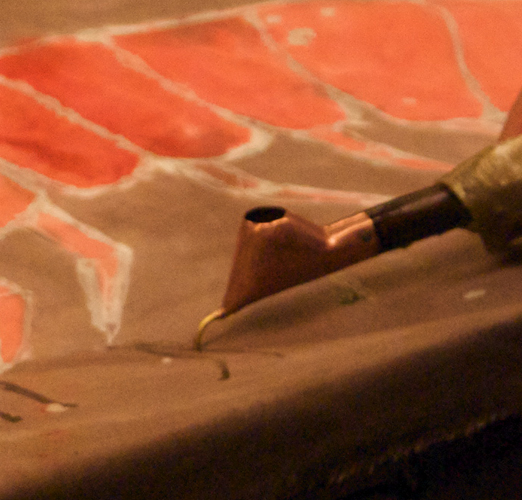
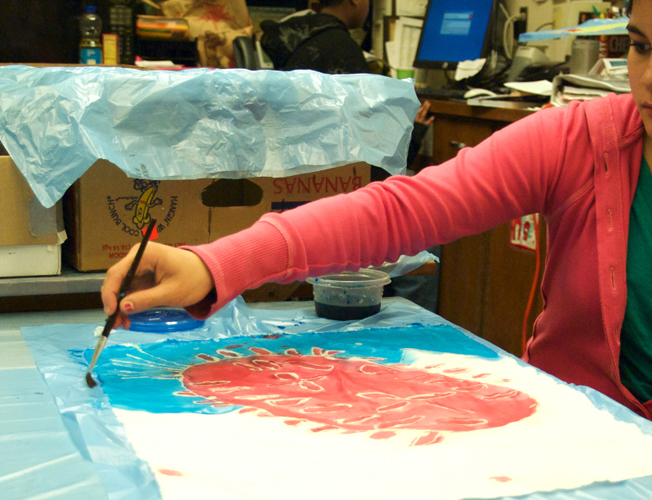
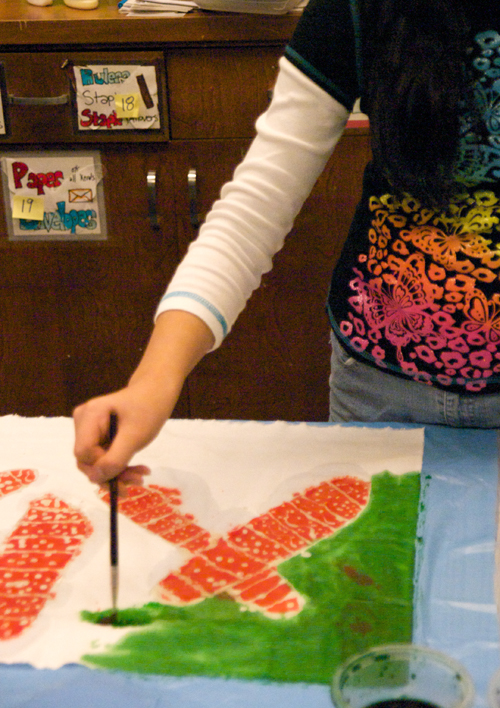
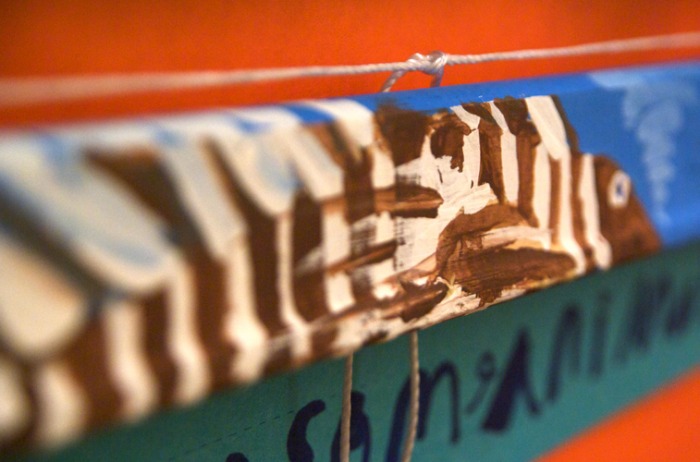
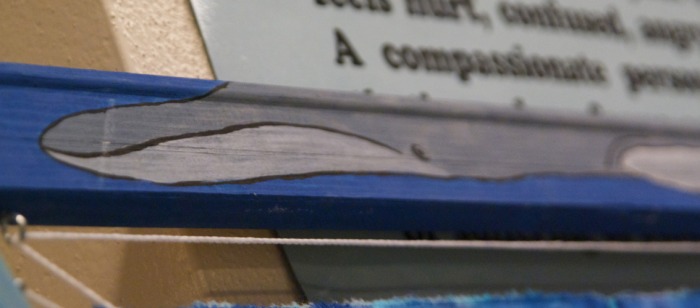
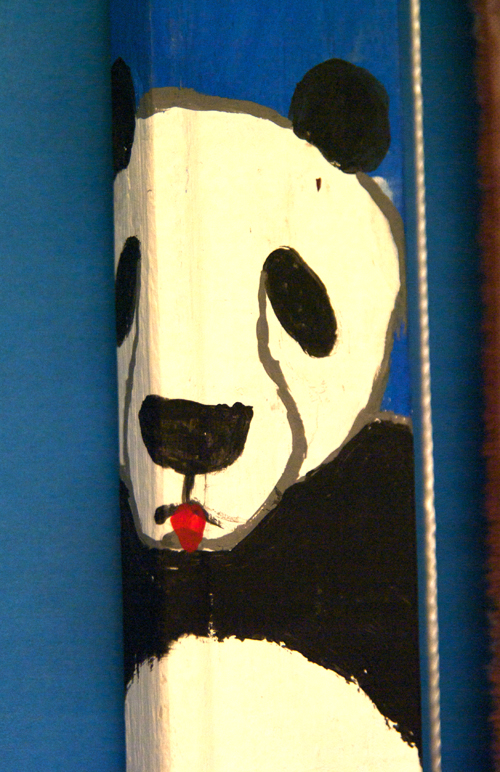
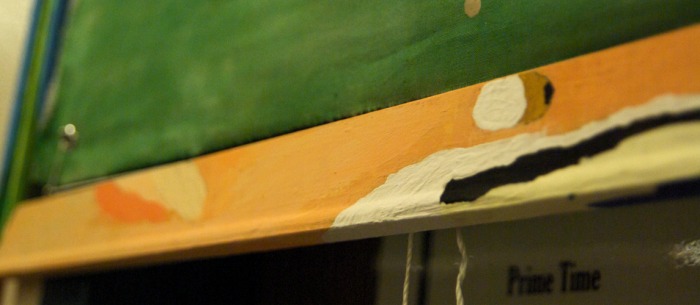
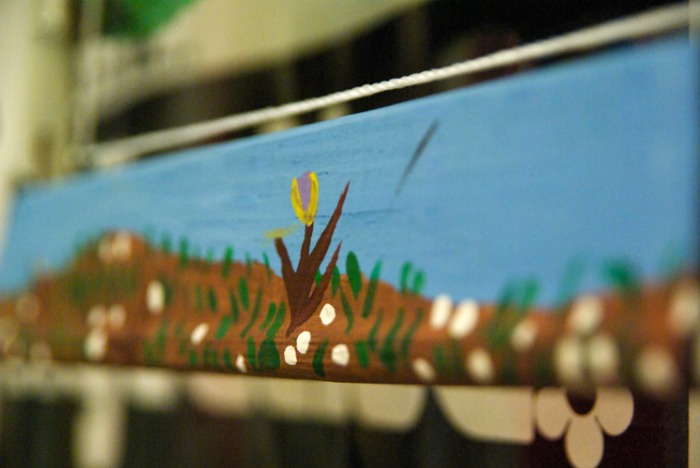
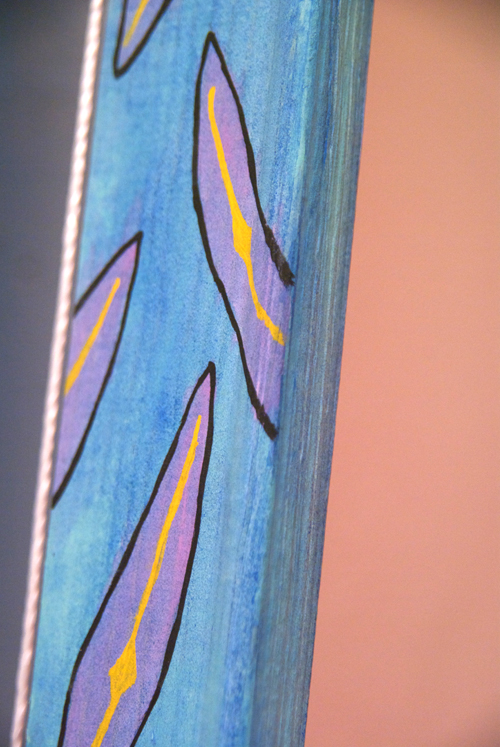
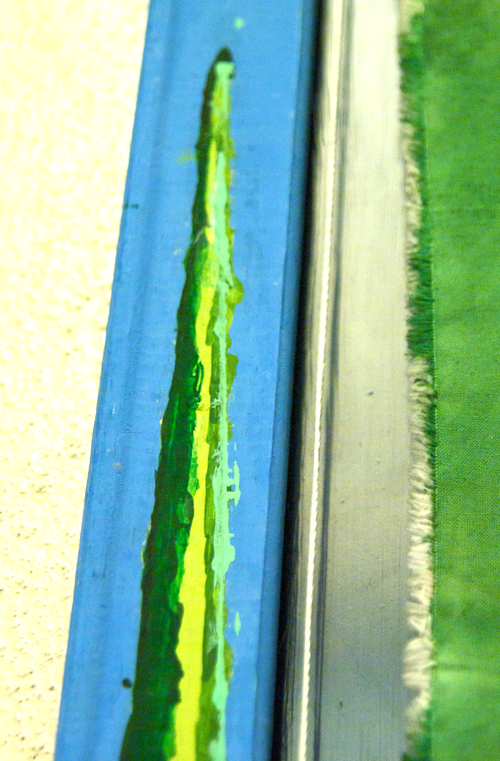
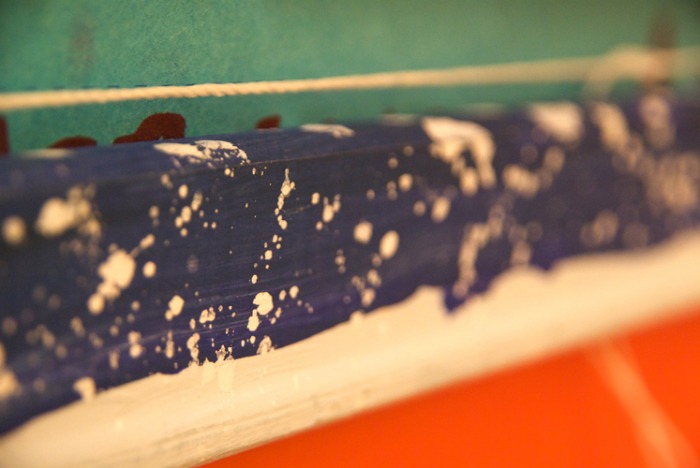
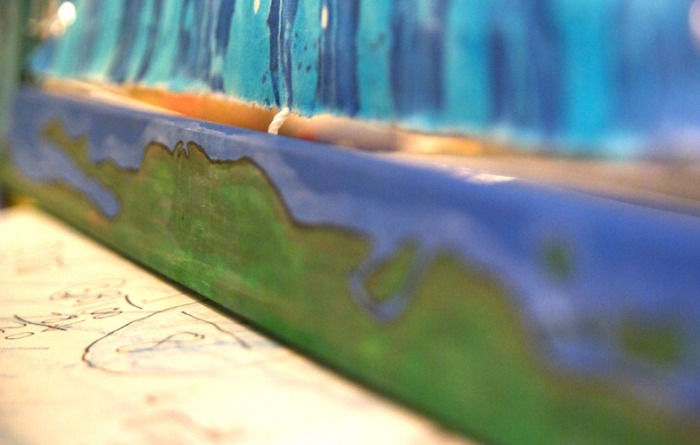
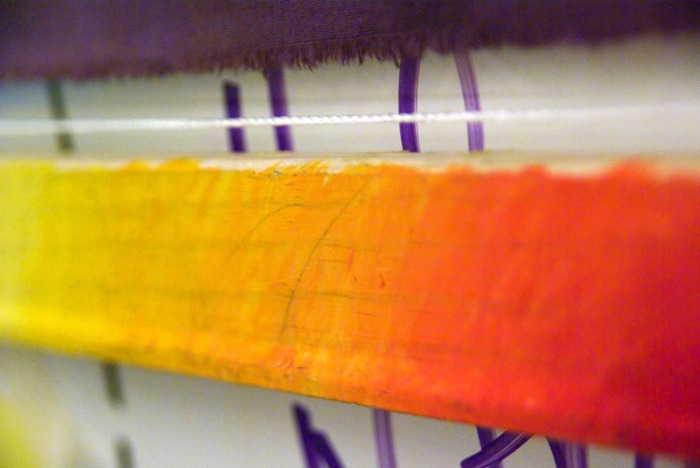
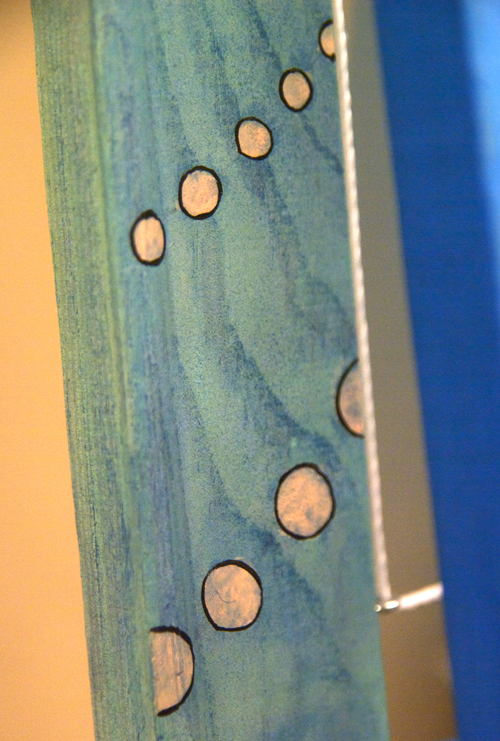
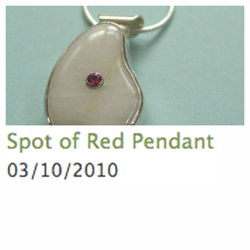
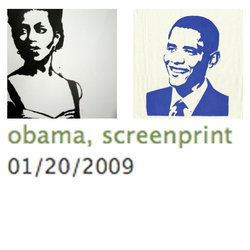
This account exists in multiple parts: • Volume 1: Explanation of the Project • Volume 2: The Frames and the Four Factors • Volume 3: Starting the Batik Process • Volume 4: Color Planning Gets More Complex • Volume 5: It's Time to Die! ...ahem... I Mean Dye. • Volume 6: These Incredible Artists Click on any image throughout to see a larger version. :::::::::::::::::::::::::::::::::::::::::::::::::::::::::::::: I love standing close to the finished works and inspecting the details. Batik is so forgiving that an accidental splash of wax or leak of dye looks completely intentional in the final project. The inefficient wax removal process gives areas of color extra contrast as they are bordered by wax-saturated fabric. Several students selected the same microorganism for their batik project, and even used the same photograph for reference for their art, but still ended up with unique and beautiful pieces. These four chose the peacock mite (watch the video!), and though the basic shapes and details are the same, the color choices alone make these works stand apart. Of course, standing back and viewing the whole piece is quite stunning, as well!  This account exists in multiple parts: • Volume 1: Explanation of the Project • Volume 2: The Frames and the Four Factors • Volume 3: Starting the Batik Process • Volume 4: Color Planning Gets More Complex • Volume 5: It's Time to Die! ...ahem... I Mean Dye. • Volume 6: These Incredible Artists Click on any image throughout to see a larger version. :::::::::::::::::::::::::::::::::::::::::::::::::::::::::::::: The second layer of dye seemed a bit like magic ink. The original wax lines would remain white, and the secondary wax lines would emerge in brilliant contrast to the new, deeper dye color that was being applied. 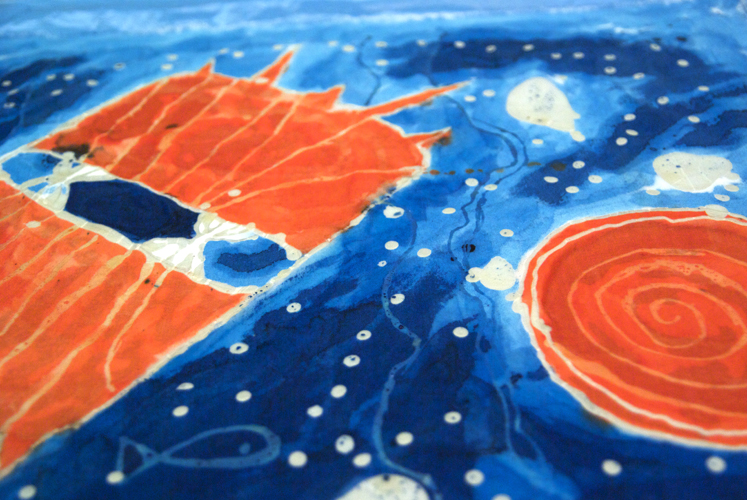 Each patch of color afforded new possibilities for dye combinations. A more intense version of the same color could be used, or a different, but complimentary color could be used. Most areas of color were large, but some required careful brush work. 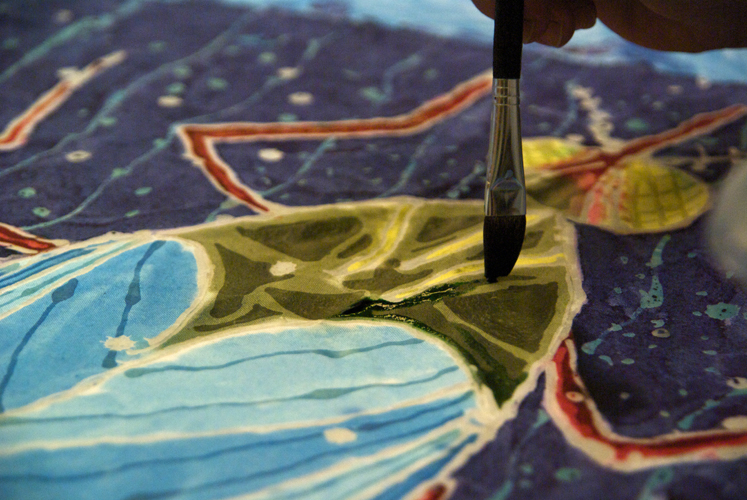 There were limited available dye locations. Students were eager to work on their dying project next, but as we ran out of time each day, I was forced to tell students that they would need to "Die Another Day." As you can see in these examples, the first layer of wax produces the white lines, and the secondary wax layers keep the lighter, first layer dye colors intact. After the second layer of dye is completely dry, all that remains is removing the wax! This is done by sandwiching the fabric between layers of absorbent paper towels and ironing it carefully until much of the wax is gone. Since these are art pieces, removing 100% of the wax is both difficult and unnecessary.   • Previous Post - Epic Art, Volume 4: Color Planning Gets More Complex • • Next Post - Epic Art, Volume 6: These Incredible Artists • This account exists in multiple parts: • Volume 1: Explanation of the Project • Volume 2: The Frames and the Four Factors • Volume 3: Starting the Batik Process • Volume 4: Color Planning Gets More Complex • Volume 5: It's Time to Die! ...ahem... I Mean Dye. • Volume 6: These Incredible Artists Click on any image throughout to see a larger version. :::::::::::::::::::::::::::::::::::::::::::::::::::::::::::::: The second layer of wax can be tricky to conceptualize. For the first layer of dye, paler colors were intentionally selected. Just as the first layer of wax kept white fabric white, this second layer of wax would keep colors exactly as they currently appear. Additional dye would be applied later. 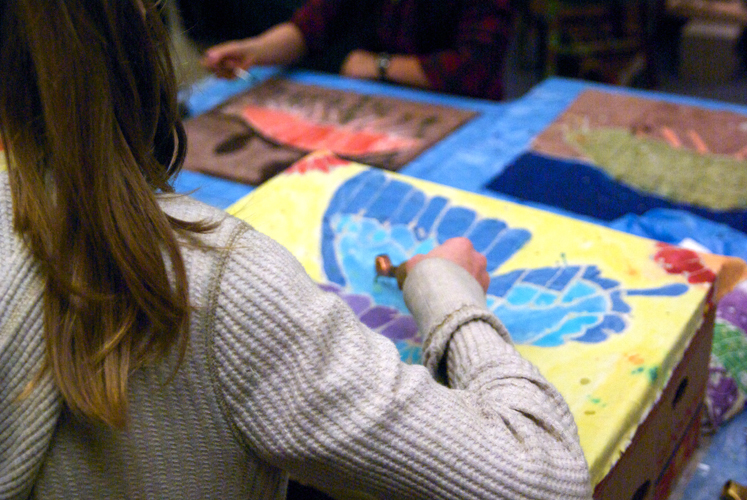 This second layer of wax and dye could create a subtle effect, using similar shades of dye, or a dramatic effect with drastically different shades of dye. Either goal takes some careful planning with the wax. This project is ready for the second layer of dye. The band across the insect's midsection will remain light brown after the wax is removed. The swirls and dots in the background will remain these shades of brown and green. 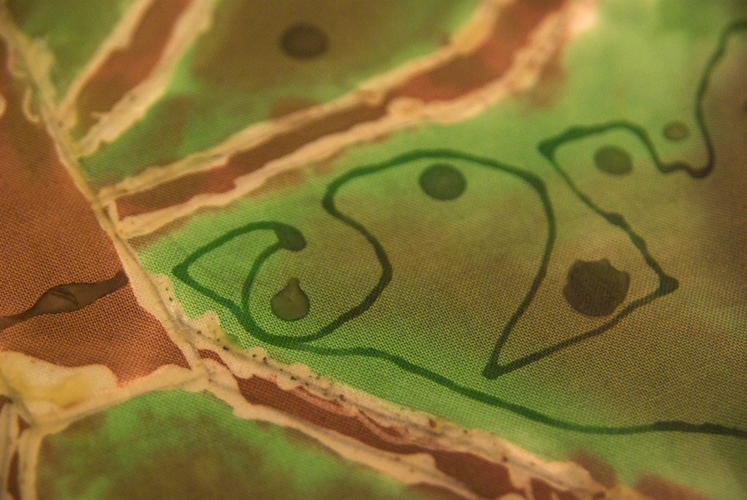  • Previous Post - Epic Art, Volume 3: Starting the Batik Process • • Next Post - Epic Art, Volume 5: It's Time to Die! ...ahem... I Mean Dye. • This account exists in multiple parts: • Volume 1: Explanation of the Project • Volume 2: The Frames and the Four Factors • Volume 3: Starting the Batik Process • Volume 4: Color Planning Gets More Complex • Volume 5: It's Time to Die! ...ahem... I Mean Dye. • Volume 6: These Incredible Artists Click on any image throughout to see a larger version. :::::::::::::::::::::::::::::::::::::::::::::::::::::::::::::: For the batik part of the project, each student chose a microorganism to represent the bottom of the food chain in their biome of study. The "microorganisms" ranged in size from the truly microscopic, such as bacteria, to the simply small, such as insects. The students sketched their organism in pencil on white fabric, and stretched the fabric across the top of a cardboard box to give it some air flow. To apply the wax to the fabric, a tjanting was filled with wax heated in an electric skillet, and applied to the fabric via the spout. The students carefully followed their pencil lines with the tjanting to create wax lines. Batik is an imprecise art. Using an unfamilar tool to apply an unfamilar medium to a less than rigid surface, all whilst avoiding drippy hot wax, made for some shaky lines and unintentional blotches. Regardless of the original intent, however, the final results were nothing less than spectacular. 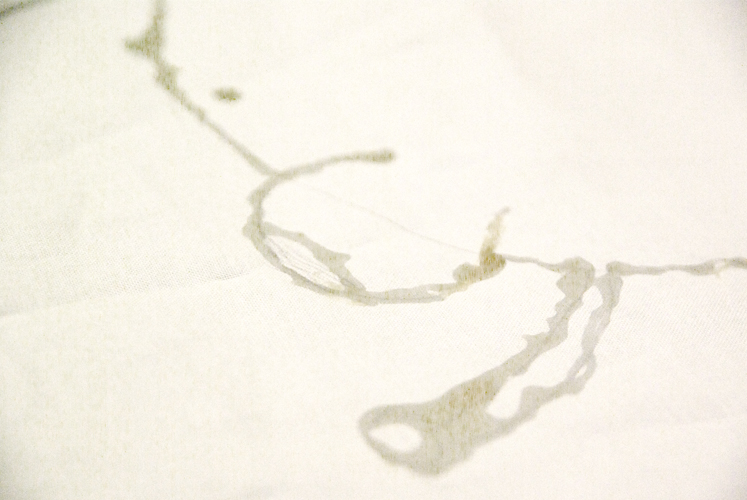 The purpose of the wax was twofold. Wherever the wax soaked into the fabric, it acted as a resist for the dye, keeping the color of the fabric static. For the initial round of wax for each student, it meant that the first wax lines and dots would remain white.  The second purpose of the wax was a barrier for the dye. The students carefully painted the fabric dye onto their designs. The liquid dye spread out on the fabric, soaked up by the fibers of the cloth, but would be stopped (most of the time) by a line of wax. This allowed the students to put contrasting vibrant colors adjacent to each other in their designs. The first layer of dye was then left to dry overnight in preparation for the second layer of wax and dye. 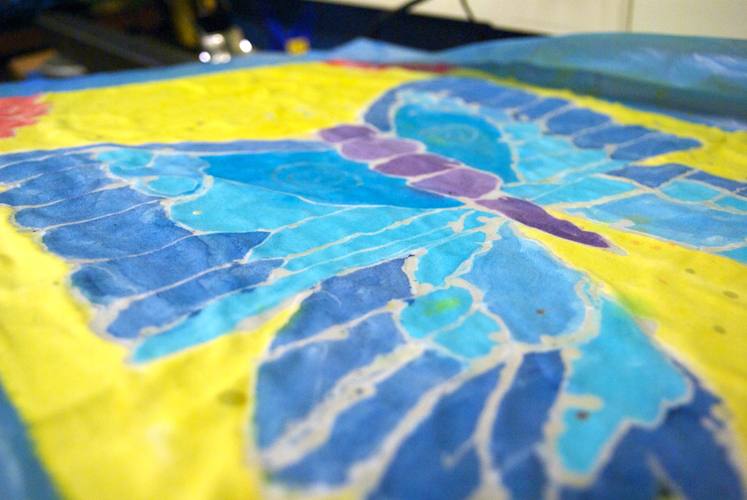  • Previous Post - Epic Art, Volume 2: The Frames and the Four Factors • • Next Post - Epic Art, Volume 4: Color Planning Gets More Complex • This account exists in multiple parts: • Volume 1: Explanation of the Project • Volume 2: The Frames and the Four Factors • Volume 3: Starting the Batik Process • Volume 4: Color Planning Gets More Complex • Volume 5: It's Time to Die! ...ahem... I Mean Dye. • Volume 6: These Incredible Artists Click on any image throughout to see a larger version. :::::::::::::::::::::::::::::::::::::::::::::::::::::::::::::: 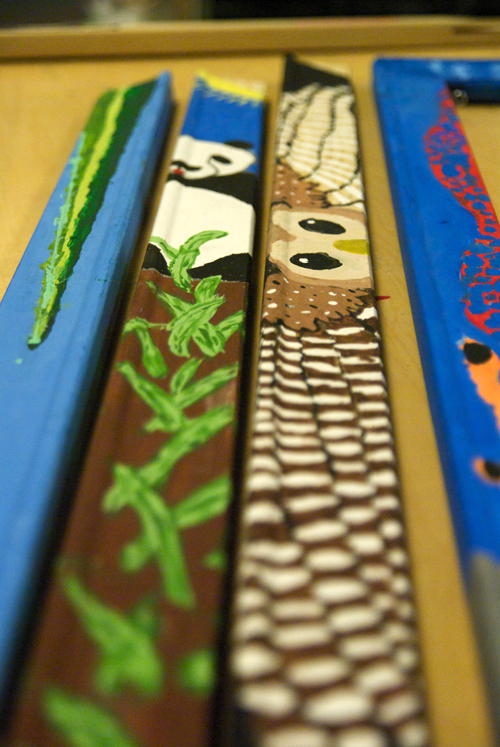 The batik project that the students were going to create was to be suspended within a wooden frame. The four-sided frame lent itself well to the four focus factors of the biome project: animal, plant, natural cycle, and abiotic factor. The frame would thus consist of four individual art pieces surrounding the final batik. Since the "canvas" was long and thin, students practiced their art in pencil first, often stretching a reference image using a proportional grid. The student below is sketching the head of a red fox onto one side of the wooden frame. 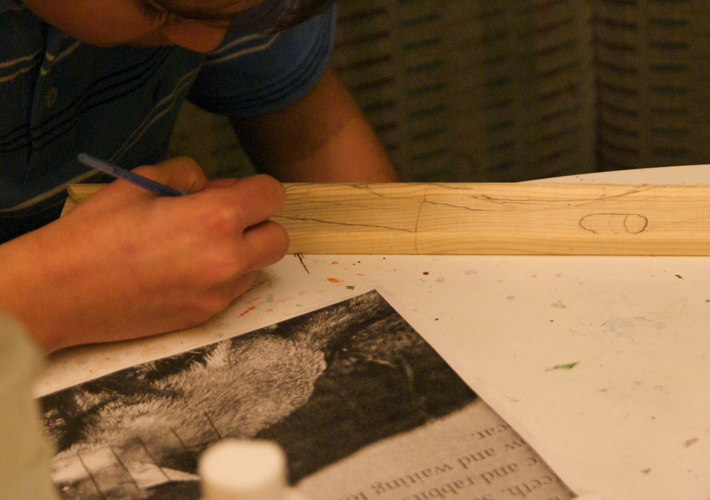 Creating just the right shade by mixing various colors of paint was a new experience for some students, and an "accidental" shade created on one student's palette could be the perfect color for another project. 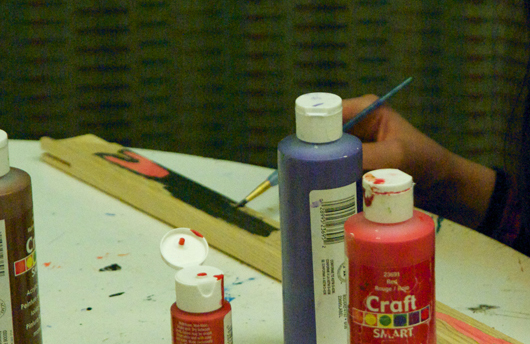 Finishing one side of a frame was a satisfying accomplishment. This student is adding a final stroke to complete the owl. 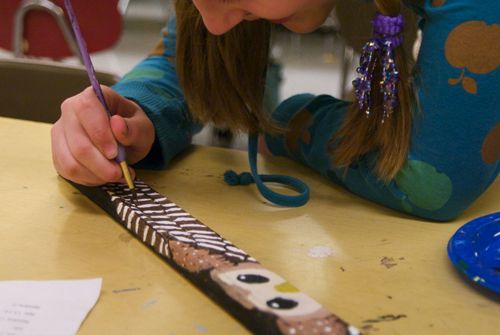 One side of each student's frame was dedicated to their primary animal. This animal would be the subject of both their research paper and their imaginative story. Below are a lionfish, humpback whale, armadillo, giant panda, and red fox. Another side must portray a plant. The plant could be either a plant specifically important to the focus animal, or a plant generally significant to the biome. Below are a flower in a grassy meadow, diatoms, and a single blade of grass. Natural cycles made up the third frame piece. The cycle should be one that has a direct impact on the animal or biome. Below are decomposition / nutrient cycle, the seasons (close up on winter), the water cycle (shown as snow), and seasonal migration (western coastline of North America). The last frame piece must depict an abiotic (non-living) factor crucial to the animal and its biome. This concept was a bit tricky because some natural cycles can also be considered abiotic factors, and vice versa. Below are sunshine and oxygen.  • Previous Post - Epic Art, Volume 1: Explanation of the Project • • Next Post - Epic Art, Volume 3: Starting the Batik Process • This account exists in multiple parts: • Volume 1: Explanation of the Project • Volume 2: The Frames and the Four Factors • Volume 3: Starting the Batik Process • Volume 4: Color Planning Gets More Complex • Volume 5: It's Time to Die! ...ahem... I Mean Dye. • Volume 6: These Incredible Artists Click on any image throughout to see a larger version. ::::::::::::::::::::::::::::::::::::::::::::::::::::::::::::::  This winter, I found myself in the role of "artist in residence" for a local middle school class. This particular middle school focuses on developing engaging curriculum by anchoring instruction in challenging masterworks from multiple fields, emphasizing the artistic process of experience, inquiry, creation and reflection as cornerstones of learning. As such, I helped guide the students through the process of creating a complex piece of art that directly incorporated the elements in which they were simultaneously engaged in their pursuits of science, literature, and social studies. The overall arc of this project was the study of interconnected relationships within a biome. Each student chose an animal on which to focus, and all other elements in their project would revolve around the biome in which their animal could be found.  The following contains excerpts from the text of the project proposal itself - mostly the portions directly relating to the final batik piece completed by each student, though all aspects of the overall project were essential to the students' grasp of the concepts involved, as all things are connected. ---- This project will span at least two months... during that time, the class will be exposed to multiple experiences that allow them to grasp the ideas of interconnectivity between factors in a biome. This project is designed as an interdisciplinary unit, with specific forays into Science, Social Studies and Literacy (Language Arts and Literature). The students will study a biome of their choice through four separate, yet interconnected, foci: animals, plants, abiotic factors, and natural cycles. This will be accomplished through library research, in-class activities, labs, and arts based activities. For example, while studying animals, the class will use live animals to study adaptations. When studying plants, the students will dissect flowers and build flowers from construction paper with the intent of learning about the reproductive structures of angiosperms. Additionally, the students will study energy transfer through organisms on a microscopic scale. This component will be the basis for the creation phase of the unit. The inquiry piece will culminate in a research paper and an imaginative story that utilizes the scientific content and enduring understanding of the factors that support the biome of study. Students will create a microorganism batik. The connection to relationships and the significant question will be that the micro invertebrates and the random nature of the batik will represent the beginning of the food chain and the micro-habitats that support the larger biome of study. Generally, the art pieces will consist of a 24″ x 18″ batik suspended within a wooden frame. Each side of the frame will be painted to represent one of the four factors of study. Just as a biome is dependent upon relationships between multiple factors, so, too, will be the completion of the project. The students will be encouraged to make metaphorical connections between the project components and the relationships they affect within Earth’s biosphere. ---- I worked with the class on this project every day for 5 weeks, with a few preparation days with the class before that time. The next few posts will chronicle the process of completing the project with the students. 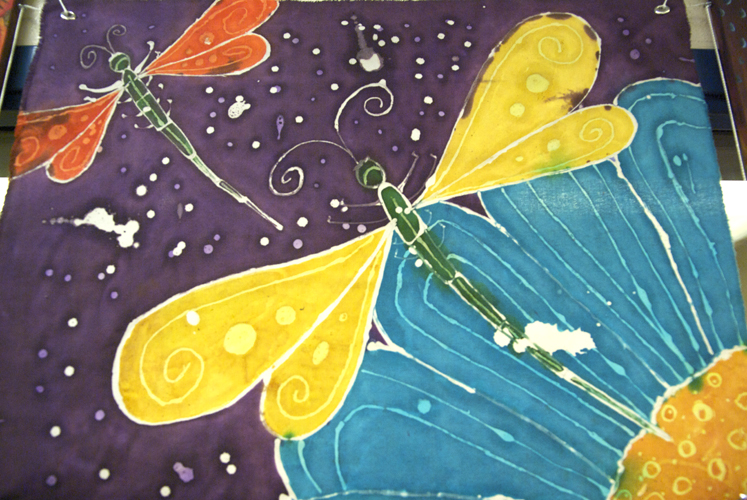   Spring is here. Blossoms are bursting forth on the trees. I wondered just yesterday what it would look like when the rosemary was blooming, and there it was. Tiny and lavender, in case you wondered. It appears as though it has finally warmed up a bit in North Carolina as well, though still raining, where my good friend Sarahbeth has just launched the new spring 2010 line for Unabashed Apparel. Captured by brilliant photographer Jana Busbin, Sarahbeth's organic daily wear collection boasts fairly traded organic hand-dyed fabrics, as well the impeccable classy style of a sassy southern woman. • Shop • Blog •  This month's craft category advertising contest had several winners; there were so many talented entrants, I just couldn't choose. Winners receive a month of free advertising on this blog. This is one of the lucky winners: Olga Kononova of Neroli Handmade Artisan Jewelry has been making things with her hands her whole life. She grew up in Russia, and now lives happily in California. Olga's unique designs are sure to delight. Visit her Etsy Shop.   A brilliant project, put together by an English teacher at a Toronto High School, resulted in this moving video. Students sing pieces of Obama's inspirational inauguration speech, and remind us, of course, of Hope. This line always gets me: "A man whose father, less than 60 years ago might not have been served at a local restaurant, can now stand before you to take a most sacred oath."  This month's craft category advertising contest had several winners; there were so many talented entrants, I just couldn't choose. Winners receive a month of free advertising on this blog. This is one of the lucky winners: Maria of Giertta refers to her jewelry as "Scandinavian Sleek." Maria is originally from Sweden, buy just recently moved to Australia. A qualified gemologist with the Gemmological Association of Great Britain, her favorite gemstones with which to work are tourmalines. Visit her Etsy Shop, Website, and Blog.   |
Topics
All

Archives
May 2021
|


 RSS Feed
HOME |
PHOTOGRAPHY COLLECTIONS
|
© COPYRIGHT 2020. ALL RIGHTS RESERVED.
|